He Who Is Faithful With Little....

My name is Nikki. My husband and I have three daughters and are Christians trying to live a simple life and raise godly children. We homeschool, garden, preserve, can, raise chickens, keep bees, and do everything else we can to be self sufficient while we live here in the city. We don't have much space on our little city lot, but we are doing our best to be faithful with little so that we may be found approved to be faithful with much (Luke 16:10). I hope you will find some useful bits of information on raising children, gardening, all matters of the kitchen, and well, homesteading in general!

Saturday, February 28, 2009

Flour Choices


In making the decision to make heathly food for my family, one of the most obvious changes had to be my choice in flour. I'd always bought white flour. It's what I was used to. But when I learned how little white flour actually does beneficially for our bodies, I was forced to reconsider.


So just how bad is white flour for us? A kernel of wheat is made of three parts: the germ, the bran, and the endosperm. Since the germ is what germinates into a plant, it is, in a plant sense, alive. When the bran deteriorates, the wheat goes bad the way oil goes rancid. In order for flour to last longer on the store shelf, some "wise" fellow decided to remove the germ so that the flour would have longer lasting power. (The bran is removed to make a finer textured flour.) Back when this was discovered, vitamins had not yet been discovered. Unfortunatly, what they didn't know has hurt us.


Since the anioxidants and folic acid are found in the endosperm, that isn't lost in refined white flour. But the fiber, protein, vitamins, and minerals are found in the germ and bran. Those are lost almost entirely. And if you buy unbleached flour you may still get some benefit from it (if it hasn't sat in a warehouse for too long.) Then somewhere along the way, some other "wise" fellow decided that the off-white color of flour was unacceptable. What it was being compared to, I have no idea. So now flour must be bleached so that it is pure white. Bleaching, however, kills off any remaining nutrition to the refined flour. Think of what bleach does for your kitchen sponge. So now flour must be enriched. But as we are finding out more and more, most forms of minerals and vitamins that are use to "enrich" our foods are absolutely inabsorbable by our bodies! It's sorta like being deficient in calcium and trying to eat crushed oyster shells to increase our calcium. While there is indeed a good amount of calcium in crushed oyster shells, our bodies are not equiped to handle it in that form. (For chickens, however, it's perfect!)


I once read something along the lines of this: if it has to be enriched, there's probably nothing of value left in it to make it worth eating.


So I switched to whole wheat flour. It's been a learning curve, because the properties of white and wheat flours are different. They just behave differently in recipes. I do keep a bit of white flour around for special treats, or the occasional recipe where white flour can't be replaced. But all in all, the transition to whole wheat has been an enjoyable one, and that says a lot with three young children who love to be picky eaters!
Pear Jam

I wanted to try a new kind of jam, and I found a recipe for Pear Jam. It has a really high sugar to fruit ratio, but I decided to try it out anyways. It turned out beautifully! Here's the recipe (from the Ball Blue Book of preserving)

Peach or Pear Jam

1 quart finely chopped, pitted/cored, peeled peaches or pears
7 1/2 c. sugar
1/4 c. lemon juice
1 pouch liquid pectin

Combine fruit, sugar and lemon juice in a large saucepot. Bring slowly to a boil, stirring until sugar dissolves. Stir in liquid pectin. Return to a rolling boil. Boil hard 1 minute, stirring constantly. Remove from heat. Skim foam if necessary. Ladle hot jam into hot hars, leaving 1/4 inch headspace. Adjust two-piece caps. Process 10 minutes in a boiling-water canner.Recipe Variation: Add 1 teaspoon whole cloves, 1/2 teaspoon whole allspice and 1 cinnamon stick tied in a spice bag to jam during cooking. Remove spice bag before filling jars.
I don't use a boiling-water canner. I keep my jars hot in the oven and the lids hot in a not quite simmering pot of water on the stove. I've never had a problem with them not sealing properly. I didn't use the recipe variation either.

Homemade Apple Cider Vinegar

First of all, let me say that I have never made my own vinegar. But I found these directions for it in a book by Sue Robishaw called Homesteading Adventures A Guide for Doers and Dreamers.
Take your apple cores and peels from whatever apple product you may be making (applesauce, apple jelly, dried apples, or what have you) and put them into a good clean plastic bucket. If you have any other fruit remains such as the pulp from wine making, jelly making, or what-not, put them into the bucket as well. Cover the fruit "generously" with warm water and drape a cloth over the top. Vinegar yeast is naturally occuring in the air, so just set your vinegar bucket in a warmish spot and wait two to six weeks. It will be pretty obvious when it's vinegar. After it has turned to vinegar a "pinkish soft slime will form over the surface. This is the mother. You can usually gently lift/skim this off (it holds together) into a jar and save it in a cool, dark place for future use." You need to store the vinegar in a container with a plastic lid because it is an acid and will corrode metal. This is true of the mother also. And store both in a cool, dark place.
She pretty much stops there, but it is my understanding that your mother is basically your yeast for your next batch of vinegar. So you would start the process over again and add the mother to the top of the water. It would just help ensure that the vinegar yeasts are there.
Sue says that vinegar that is just from apples can vary greatly in strength. She uses the best (strongest) for pickles and salads and the worst (weakest) for cleaning.

* Update: I have now made homemade apple cider vinagar. It was a very easy process and I am looking forward to when I can do it again. HOWEVER, my vinegar is very, very strong and I haven't been brave enough to try using it with food. I use it only for cleaning.

Hummus

Hummus

1 can Garbonzo beans (chick peas)
2 T. Lemon Juice
1/4 c. olive oil
1 t. Cummin
1/2 t. salt
1/8 t. Garlic powder

Drain the beans and pour in medium sized mixing bowl. Add the rest of the ingredients.
Take a potato masher and mash a bit. You can skip this part if you have a heavy duty blender. But I don't so I mash it a little and then....
Finish it off with my hand mixer!
Traditionally, hummus is eaten with Pita bread. But it's good on tortillas and great on saltiine crackers!
For a great, healthy lunch serve hummus with saltines, unsweetened applesauce, and string cheese.
Enjoy!

The Homemade Home

We have all been in a friend’s home where everything seemed so warm and inviting. These tend to be homes that are full of things made with love, grandma’s afghan over the back of the chair, flowers picked from one’s own garden, a hand embroidered table runner, and cookies that melt in your mouth. It has long been my desire to make my home inviting to all who come, and especially to my dear hubby when he steps in each evening after a hard day’s work. I have mourned over women who just don't understand why her husband barely gets home from work and is off again for a "guys night." Now, every guy needs the chance to go out with the guys and, well, be guys - shoot rabbits, ride mountain bikes, go on midnight snow hikes, and such.
But for the most part, a man should enjoy being in his home. It should be his place of rest, his sanctuary. It is said that “the way to a man’s heart is through his stomach.” And it’s funny how we associate old fashioned hospitality with food! Every time I visited my great-grandmother’s home as a child she was quick to whip up a tray of fresh veggies from her garden, or left over pie with homemade ice cream, or even just a small plate of cookies (which I admit were not homemade, but oh how we looked forward to those strawberry wafer cookies!) The smells and tastes of the food she put out for us were unique to her home. It endeared us all the more to visiting Nana. Another home, one of a good friend, was almost always full of the aromas of “blondies” as she called the cocoa-less brownies, toasting honey granola, or, if you were fortunate enough to show up the week before Valentine’s Day, the most incredible raspberry preserve topped, vanilla iced cookies one could ever imagine! Even now, I cannot help but find a time to stop by in mid-February. What about your home? When you invite friends over so the children can have a play date or when a friend just “pops in” unexpectedly, what can they look forward to to tantalize their taste buds? I will admit that I am not much of a baker. Oh, I can bake when I need to, but I don’t have fresh chocolate chip cookies baking in the oven every other day, and a busy day cake to me is something that I ask hubby to pick up on the way home when I’ve had too much to do! But I have a recipe for Old Fashioned Tea Cake Cookies that is so quick and simple to whip up, that it is almost a crime not to stick a tray of them in the oven when I know someone is coming over, or even if I don’t know for that matter! I can mix it up while talking to my unexpected company and we can visit while the aroma of baking cookies permeates our senses. And everyone who comes to my home for dinner knows they will be treated to homemade bread served with hand-picked, homemade, wild chokecherry jelly and honey from my own bees.
Make your home a place your husband loves to come home to. A place where he is eager to walk through the front door, waiting to see what aromas tantalize him. Make it a place where anyone who walks through your door can expect your good hospitality! I don't mean that one is not hospitable if she does not have some delicious morsal waiting to be gobbled up every second of the day. But looking back, it really is food that makes my memories relate them to hospitality, even it was just that we got to collect the eggs at a friend's farm (she'd always let us take one home!) or pick fresh raspberries. Somehow for me it does always tie back to food. It's a wonder I'm not twice my size!
Happy Trails! Oh, and P.S.
Old Fashioned Tea Cake Cookies
1 egg1/3 c. sugar1/3 c. oil1 tsp. vanilla flavoring1 c. flour1 Tbs. baking powder½ tsp. salt
Beat the egg a little with a fork in a small bowl. Mix in the sugar, oil, and vanilla. In a medium bowl, mix the flour, baking powder and salt. Stir the wet ingredients into the dry and drop by the spoonful onto a buttered cookie sheet. Bake at 400 degrees for 8-10 minutes or until the bottom edges of the cookies are just golden.

Favorite Bread

After many years of testing different bread recipes, I've finally found one that my family loves and is soft and light enough for using to make sandwiches, and it's 100% whole wheat!

Favorite Bread ~ 2 loaves

1/4 c. honey
1 1/2 t. salt
3 T. butter
1 3/4 c. warm water
5 c. whole wheat flour (I use whole white wheat flour)
1 scant Tbs. yeast

Mix honey, salt, butter, water, yeast, and 1 1/2 cups flour in a large bowl and mix with a whisk for about 3 minutes. Stir in the rest of the flour. Add enough flour so that the dough just stops sticking to your hands.

On a clean surface (surface may be oiled or floured) knead the dough until it is smooth and elastic. This usually takes me a full ten minutes. Shape the dough into a ball and roll it around in an oiled bowl so that the dough will not get dry spots. Leave the dough in the bowl and cover it with plastic wrap, a large plate, or clean, damp cloth. Let it sit until nearly double in size. Squish the dough back down, and let sit (covered) for ten minutes.

Meanwhile, oil two medium sized loaf pans. Divide the dough in half and roll into logs that fit the pans. Place seam side down in the pans and lightly oil the top of the dough. I just spray it lightly with a non-stick spray. Cover again and let double in size.

Bake in a pre-heated oven at 375 degrees for 27-30 minutes. You may cover the top with foil after fifteen minutes if you like your bread to be just golden on the top.

Take bread pans out of the oven and set on a rack to cool. I leave the bread in the pans and cover it with a clean cloth for one hour. After one hour I place each stil warm loaf into a zip lock bag and let it sit at room temperature overnight. This helps the bread to reserve its moisture. The next morning I put the loaves (still in their bags) in the freezer unsliced.

Whenever I know we are going to need bread, I just take a loaf out of the freezer and let it thaw at room temperature over night. The next day it's just like it's fresh!

Honey Soap

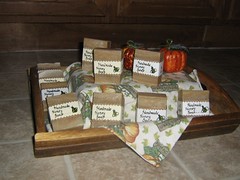
Honey Soap ~ A wonderful hand and body soap made with real honey! (unscented)

SOLD OUT!!!

3.25 oz bar - $3.00